
Setup guide · Two Google keys, not one
Get to a working key without guessing which console.
repeat.cards runs its AI on your own provider keys. It accepts three, they come from three different places, and two of them are Google keys that cannot do each other's job. Here is each one, start to finish.
Which key pays for what
Translations, word checking, mnemonics, example sentences, card chat
- Which key pays for it
- OpenAI or Gemini — whichever model you pick
Reading a word off a screenshot
- Which key pays for it
- OpenAI or Gemini — whichever model you pick
Spoken pronunciation
- Which key pays for it
- OpenAI or Cloud Text-to-Speech
Pictures on cards
- Which key pays for it
- OpenAI only
An account can hold all three at once. Each key is saved, replaced and removed on its own, and removing one disables only the features that spent it.
OpenAI API key
The shortest of the three: one page, one button, no restrictions to choose. The only catch is money — this is the key that needs credit before it will answer at all.
- Sign in at platform.openai.com. Your ChatGPT account works here. The API is billed separately from any ChatGPT subscription, which is the part people are most often surprised by.
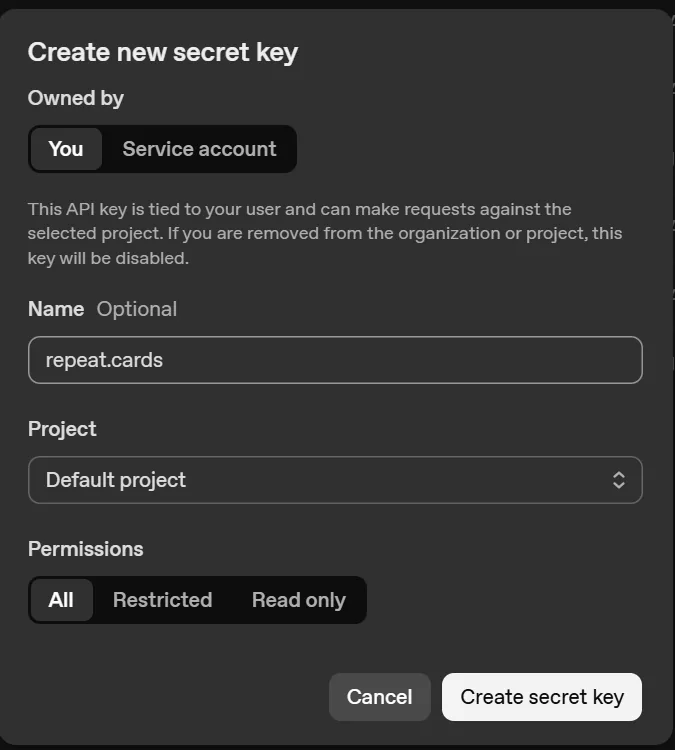
- Open API keys. It is in the left-hand menu, or go straight to platform.openai.com/api-keys.
- Create a new secret key. Leave "Owned by" on You, give the key a name you will recognise later, and leave Permissions on All. repeat.cards uses several OpenAI endpoints, so a restricted key will fail on whichever one you left out.
- Copy it immediately. OpenAI shows a secret key once and never again. It begins with sk-. If you lose it, delete it and make another — there is no way to read it back.
- Add credit. Under Settings → Billing. This is the one key of the three that needs money before it does anything: the API runs on prepaid credit, and ChatGPT Plus or Pro does not pay for it.
- Paste it into repeat.cards. Profile → AI Settings → OpenAI API Key, then Save.
Billing: Required. Prepaid credit, bought separately from any ChatGPT subscription.
Gemini API key
This is the longest of the three, and the only one with a fork in it.
Two different Google consoles will issue you something called a Gemini key, and they do not behave the same. Take the AI Studio route below. The Cloud console route is longer, and it ends with a key that can never also do your pronunciation audio — so read to the end of this section before you start.
- Go to aistudio.google.com/apikey. Sign in with any Google account. This is Google AI Studio — not the Google Cloud console, which issues a different kind of key.
- Press Create API key. The button sits at the top right of the API Keys page.
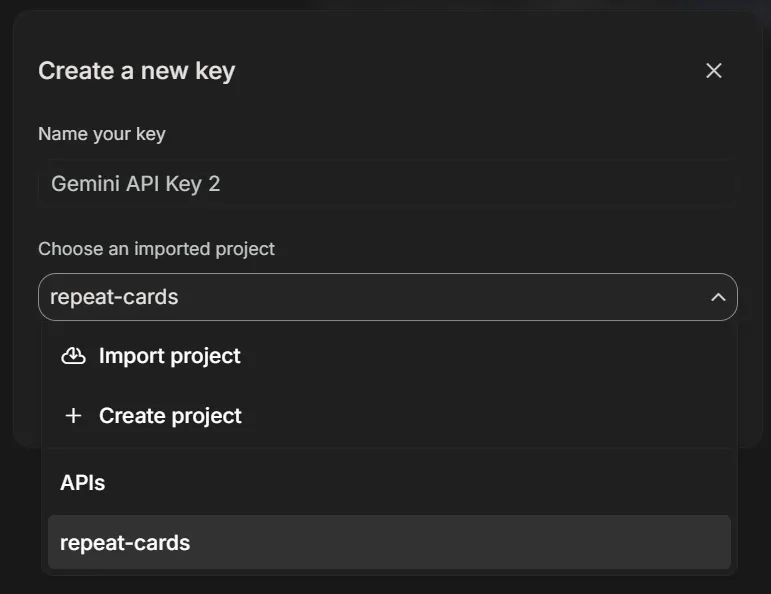
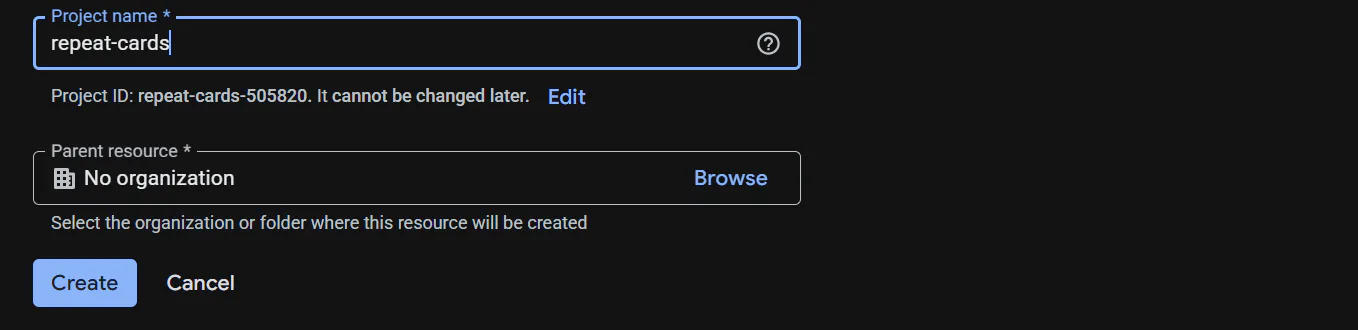
- Choose a project. A Gemini key always belongs to a Google Cloud project, which is why the dialog asks. If you have none, pick Create project in the same dropdown and give it any name — repeat-cards will do.
- Create the key and copy it. Keys issued by AI Studio begin with AQ. Google calls these auth keys, and they are the kind the Gemini API expects.
- Paste it into repeat.cards. Profile → AI Settings → Gemini API Key, then Save. repeat.cards asks Google whether the key works and shows you the answer in Google's own words, so you find out now rather than at your first card.
Billing: Not required to start. AI Studio issues keys on the free tier; a paid tier needs a billing account on the project.

If you have to use the Cloud console instead
Some organisations do not allow AI Studio. A Gemini key made in the Google Cloud console works, but it costs you two things. It must be restricted to the Gemini API, because an unrestricted key of that kind is refused outright — and as of August 2026 the console also states that a key for the Gemini APIs has to be bound to a service account, a step this guide does not cover.
The restriction is not free either. It is precisely what stops that key doing Text-to-Speech, because Google’s restriction picker will not let the Gemini API share a key with another service. Whichever route you take, pronunciation needs its own key.
Cloud Text-to-Speech API key
This is a Google key too, but not the Gemini one and not from the same console. It comes from the Google Cloud console, and it is the one place on this page where a wrong click leaves you with a key that saves cleanly and then makes no sound.
- Open console.cloud.google.com and pick a project. Use the project selector in the top bar, or create a project — any name will do. This is the Google Cloud console, a different place from AI Studio.
- Attach a billing account to that project. Text-to-Speech synthesises nothing on a project with no billing account, even inside Google's monthly free allowance. Google's current prices are on its own pricing page.
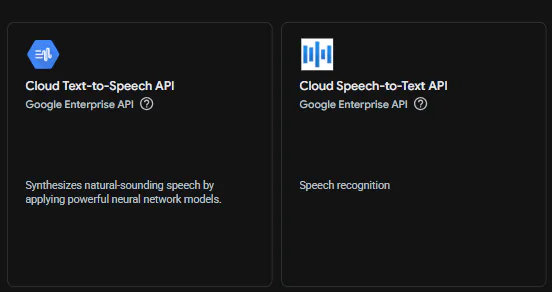
- Enable the Cloud Text-to-Speech API. APIs & Services → Library, search for "text-to-speech", open Cloud Text-to-Speech API and press Enable. Nothing else needs enabling.
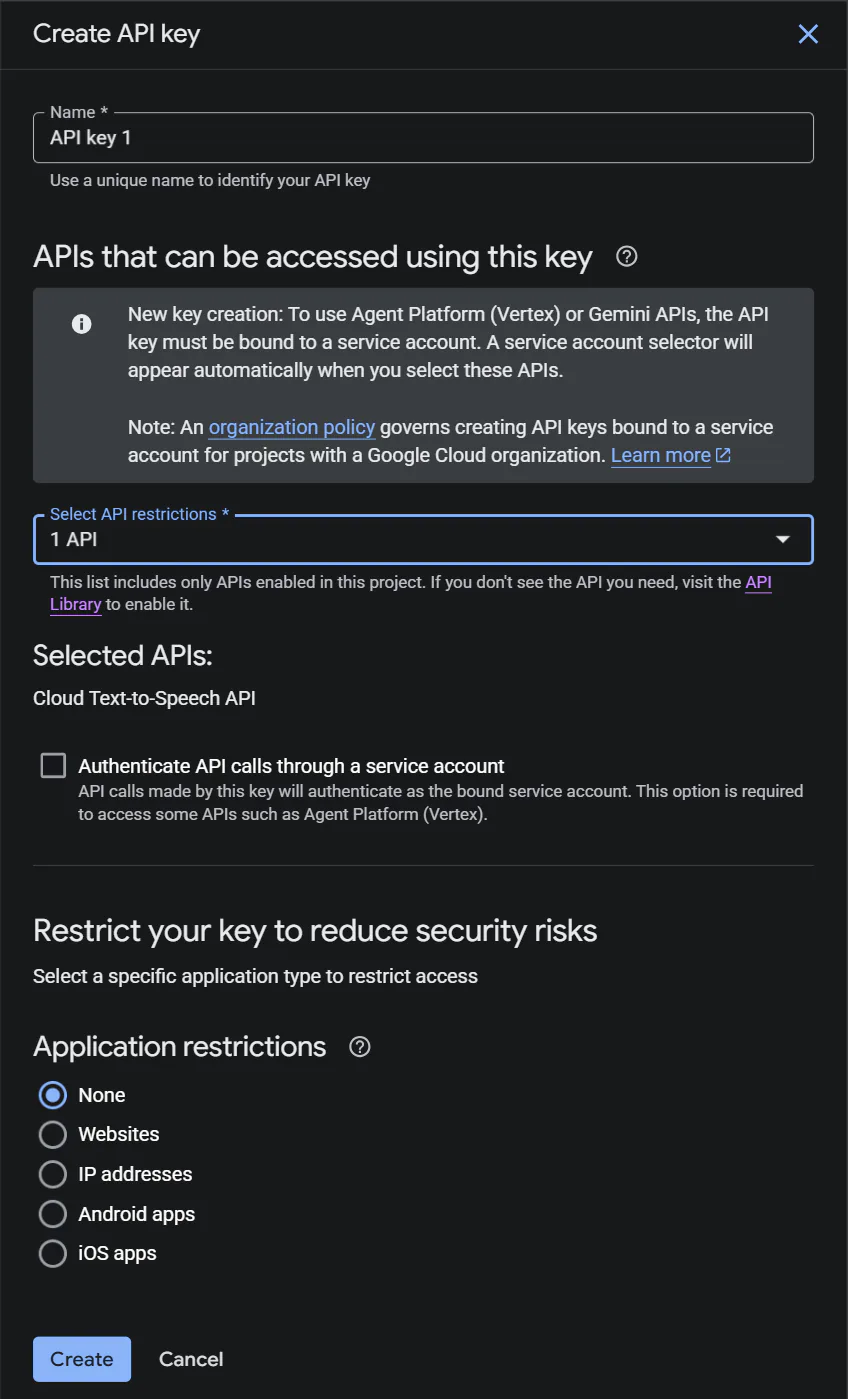
- Create the key. APIs & Services → Credentials → Create credentials → API key.
- Restrict it to Cloud Text-to-Speech — and to nothing else. Under Select API restrictions, tick Cloud Text-to-Speech API alone. The field is required, so there is no unrestricted option here any more. Do not add the Gemini API to this key: a key restricted to Gemini answers Text-to-Speech with API_KEY_SERVICE_BLOCKED, and Google will not let the Gemini API share a key with another service. That restriction is exactly what silences your cards.
- Copy it and paste it into repeat.cards. The key begins with AIza. Profile → AI Settings → Cloud Text-to-Speech API Key, then Save.
Billing: Required. The API refuses to synthesise on a project with no billing account attached.
Questions people actually hit
Can one Google key do both Gemini and pronunciation?
I already had a Google key and my card audio stopped working.
Do I need all three keys?
What does repeat.cards do with a key I save?
The screens do not look like the pictures here.
Keys in, and the cards build themselves.
Translations, example sentences, mnemonics and pronunciation, on your own provider account. repeat.cards adds nothing on top.
Open your AI settingsEach key stored, masked and removable on its own